Introduction
Many of us know that begonias can be easily propagated through cuttings. At times, it can be so easy that we might wonder why anyone bothers with seeds at all, but there are quite a few good reasons to do so. For one thing, many species are only available as seeds, be it due to their rarity, slow growth, or difficulty in growing through cuttings. Why risk cutting up your rare jewel of a plant in hopes of growing a few more when you could collect seeds and have hundreds?
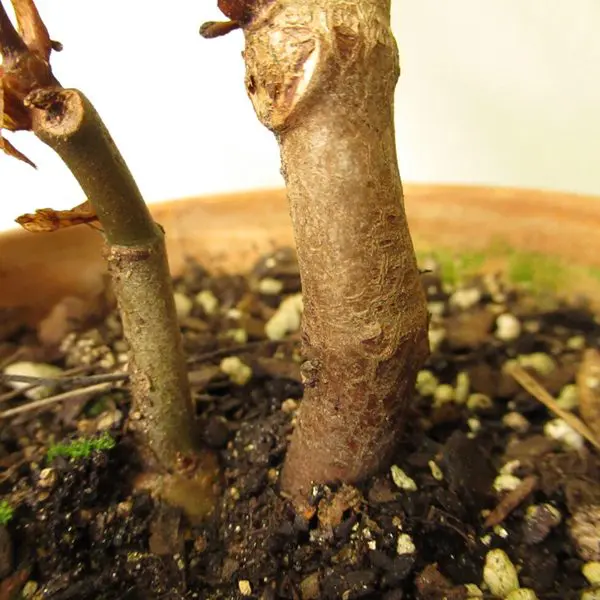
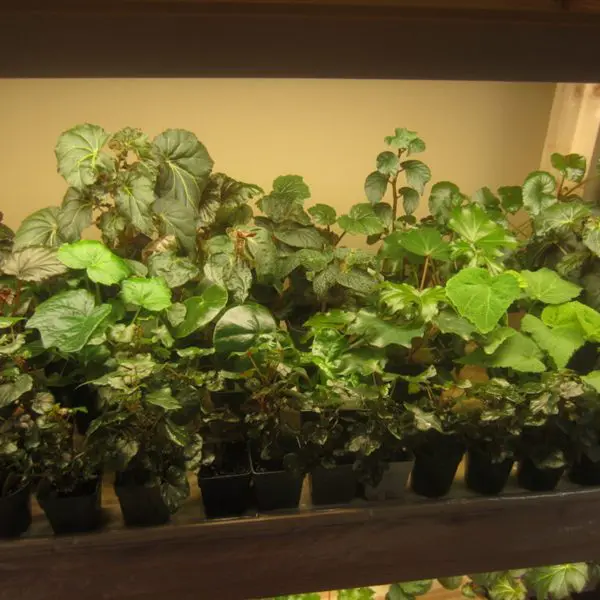
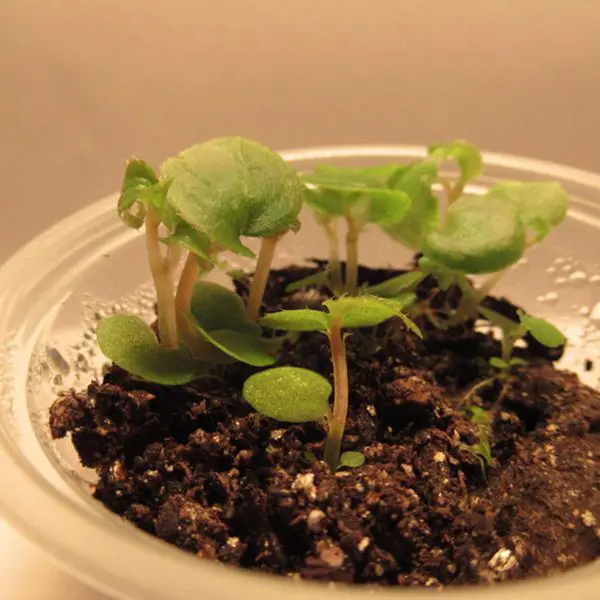
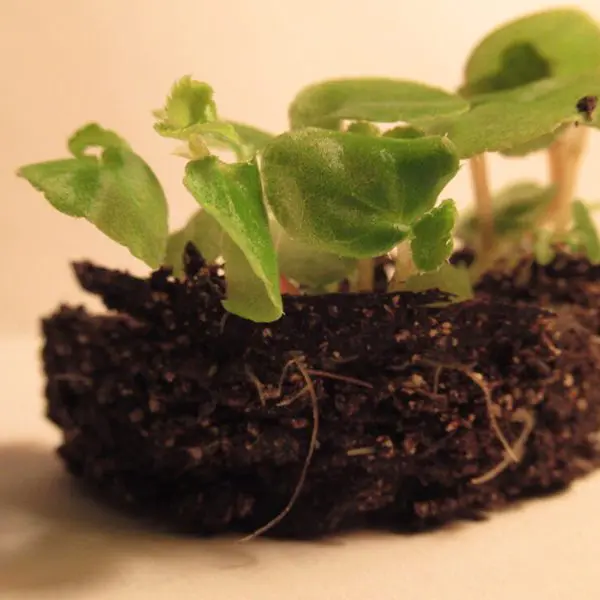
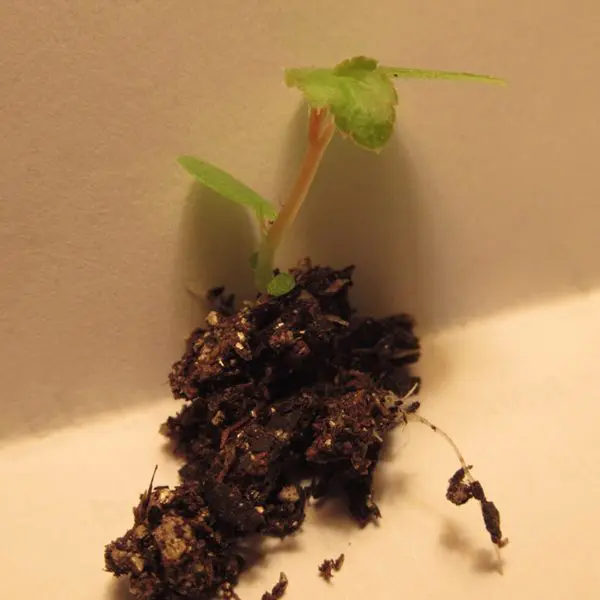
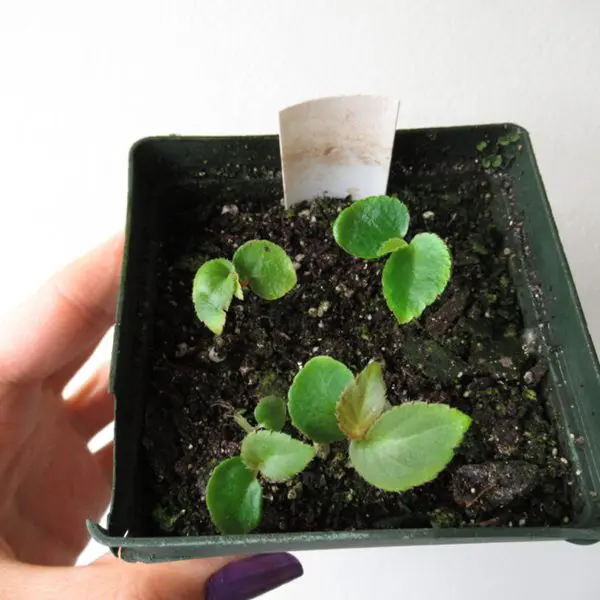
Also, some species can be grown easily from cuttings but these will either be weaker than those grown from seed or will not have the same growth pattern. Compare the swollen bases of the six-month old Begonia pachypoda seedlings to the slender base of the 18-month old cutting in the photos to the right.
And for those who are excited by hybrids, they would literally not exist at all were it not for the seeds resulting from the crossing of their parents. For clarification, all hybrids are created from seeds but few can be propagated as such. Seeds grown from a hybrid, particularly those with complicated lineages, are unlikely to resemble the original hybrid even when self-fertilized.
The thrifty among us might also appreciate the cost-effectiveness of paying a few dollars for an envelope full of enough seeds to grow more plants than we know what to do with rather than dozens of dollars for a single plant. Naturalists will find appeal in experiencing the process of going from a nothing of a seed to a full-grown plant. But most importantly, it is also lots of fun.
I was asked to write down some notes on how I grow begonias from seed but must start by saying firstly that I am still somewhat new to the practice and learning as I go along, and secondly that much of what I know and do is largely based on Brad Thompson’s now-defunct “Brad’s Begonia World” website and Freda Holley’s article “Growing Begonias from Seed: The Easy Way*”.
Supplies
Seeds
The first thing that you will need is, naturally, begonia seeds. Seeds for plants not in your collection can be purchased from a variety of sources including gardening clubs and societies such as the American Begonia Society’s Seed Fund (a major membership perk), commercial sources, various online marketplaces, and other hobbyists.
Be wary of online ads with poorly edited pictures of begonias with outrageous colors, hybrids that won’t grow true from seed, and ads for plants with nonsense names or pictures that aren’t even begonias. These abound. Other listings to question are those for small numbers of seeds for large prices. Well-fertilized flowers readily produce hundreds, if not thousands, of seeds each; there is no place for selling seeds at a dollar each.
Questions to ask a seed vendor include whether the seeds were open pollinated (which increases the chance of hybrids among the seeds if they are coming from a large and varied Begonia collection), the age of the seeds (seeds lose viability with time), and how they are packaged (it is easy to put seeds into a plastic bag but nearly impossible to get them out).
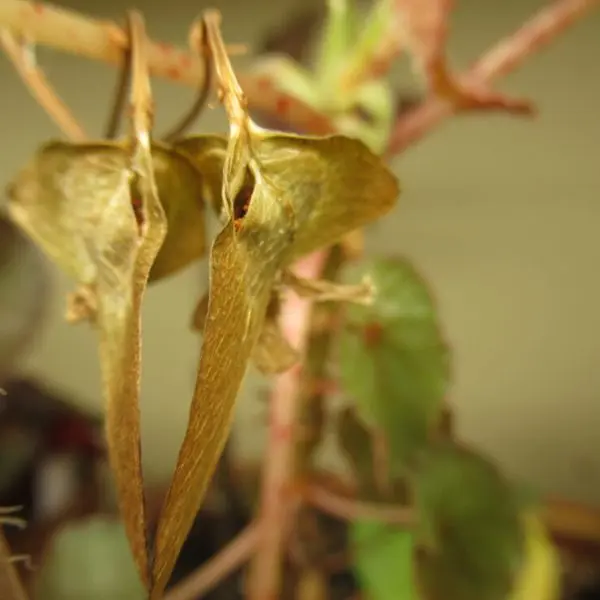
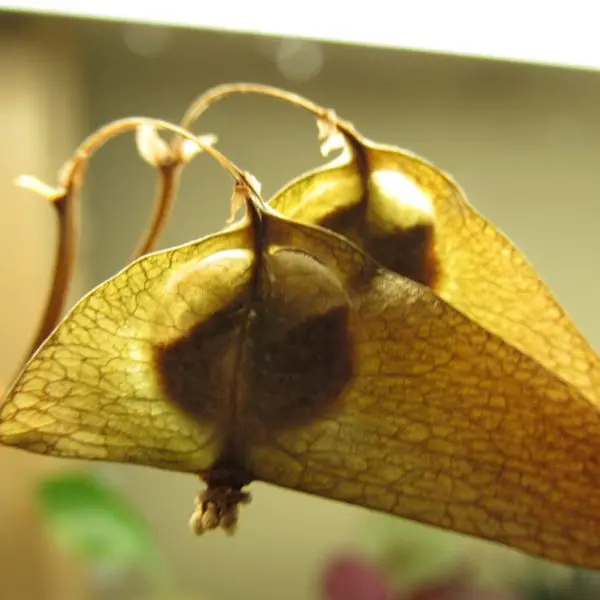
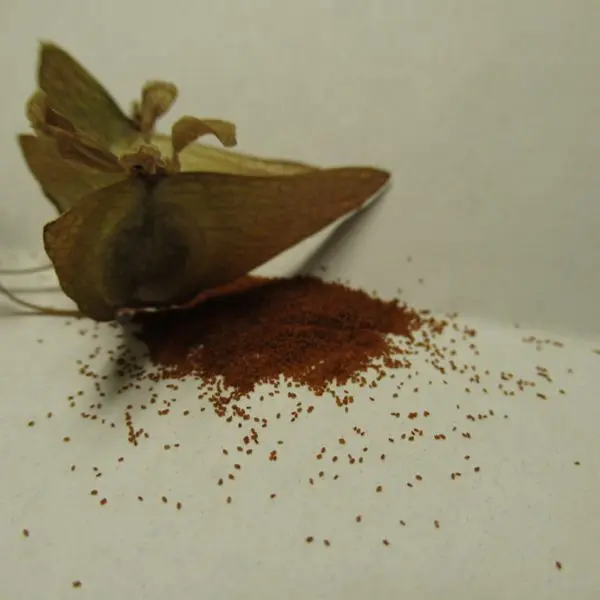
Collecting your own seed can be very easy, too. Allow me to skip lots of information about plant reproduction, a whole separate topic altogether, and start with seed pods. You will know that they are ready for harvesting because they will be completely dry full of seeds that are visible when backlit and have begun to split along the top.
- Cut off the seed pod and carefully carry it to your workspace, without spilling the seeds in the process.
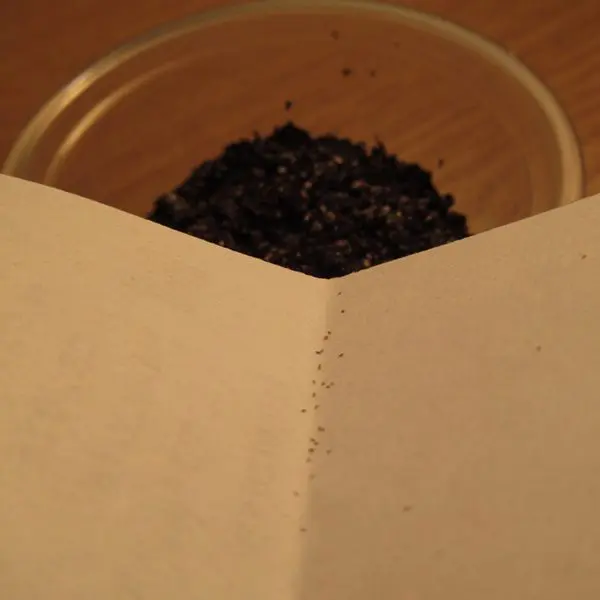
- Find a white piece of paper and fold it to form a crease and then open it up and lay it flat on a work surface.
- Gently tip over your seed pod to pour out its contents onto the paper. If seeds are few, you can shake the pod and even tear it open but avoid crushing it too much as you will next need to separate the seed from the chaff (i.e., broken pieces of seed pod).
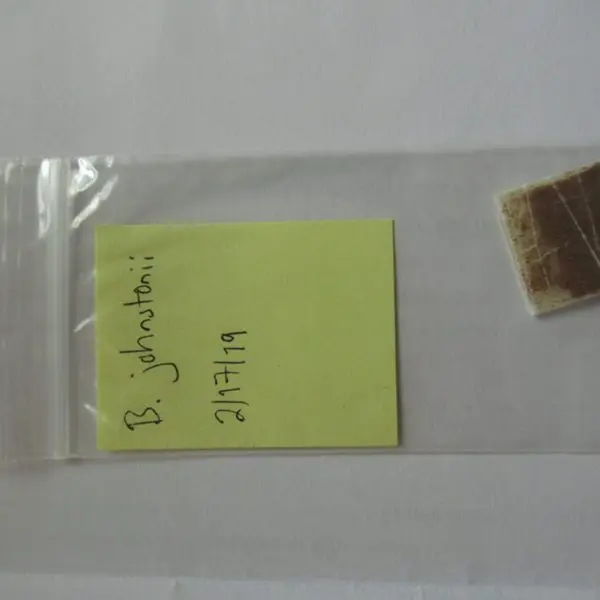
- Once clean you can use the crease in the paper to help you pour the seeds into a seed envelope. Glassine envelopes are great as they are translucent so you can see what you have and, as you might expect considering the material, the seeds slide right out. I am cheap and have an ancient roll of wax paper so fold my own envelopes. Whatever you do, never pour your seeds directly into a plastic bag or use tape to seal up a leak. Your seeds will stick frustratingly to plastic leaving you to struggle with how to take them out, and will stick hopelessly to any tape that they come in contact with. That being said, I store my small seed envelopes in small resealable plastic bags from a craft store to make them easier to handle and to label.
- Label your seeds. Always. Names of the parent(s) and the date should suffice.
- Regardless of where you get your seeds, you should store any excess in a cool, dry place. They will last a good while in your refrigerator. There is no set time that seeds will last, but a few years is common, keeping in mind that the older they are, the worse the germination.
Containers
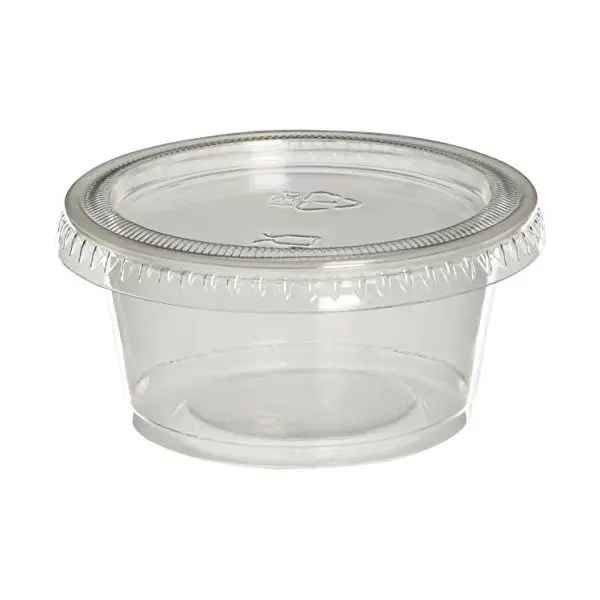
Begonia seeds are tiny and their seedlings are just slightly larger so you don’t need a large container for starting seeds. I use 2oz condiment cups.
I bought a sleeve or two of this size because it was what I found at the store but you could surely use larger or smaller ones. It is a matter of finding a compromise between the ease of handling large ones vs the space-savings of the small ones.
These cups are such an improvement over using small pots. For one thing, they are much smaller than the smallest of pots so you can grow more varieties in a smaller space. Since they are completely transparent you can also inspect them with greater ease than pots with opaque sides. Their individual lids let you move them around independently based on their growth. Their isolation also helps control the spread of any pests or contaminants such as fungus gnats or algae. They are also reusable and won’t degrade over time, yet can be recycled once you have moved on to other hobbies.
Growing Medium
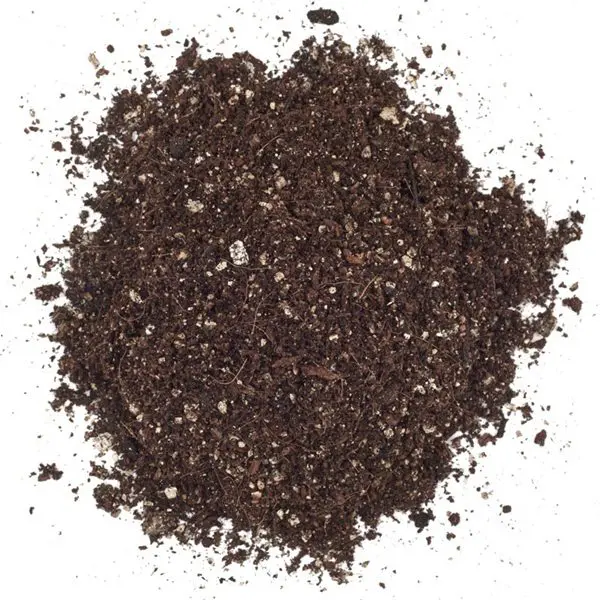
People have all kinds of ideas as to what medium you should use for growing, everything from DIY mixes, to specialty products, even so far to suggest artificial substrates such as used mop heads. The one place for consensus is that you shouldn’t use dirt. Or “soil,” should I say, for those who are sticklers for words. You should use a soil-less potting mix and you should only use it fresh from the bag. A big hunk of Georgia clay will kill your seedlings as surely as it will your full-grown plants, and used potting mix is full of all kinds of spores from algae to mosses that will overrun your delicate seedlings and all kinds of creatures like fungus gnats and nematodes that will gladly eat them, too. I use the same potting mix that I use for my full-grown plants as I can’t be bothered to keep track of multiple things, and they will have to be able to grow in that mix eventually so they might as well start from the beginning.
Practical as that may sound, I surely fail to grow some plants due to not giving them the proper growing medium.
Whatever you end up using, make sure that it is moist but not fully wet. You will find that the small plastic containers lose very little of their moisture and I haven’t had great luck growing seedlings in soggy conditions. As a rough guide, I add water until the mix starts to clump together when squeezed but breaks apart easily when poked.
Many people suggest sterilizing your mix before planting. I have done this and I have not done this and both seem to work just fine so it doesn’t seem worth the extra effort. If you are worried about contamination or have had bad luck in the past you can try things like adding boiling water to your mix (in a heatproof container!) or placing it in the microwave (the smell isn’t great but doesn’t last). Lab workers, unimpressed by your efforts, will point out that the sterility is short-lived as spores and things will contaminate your mix as soon as the sterilized mix is exposed to the air, added to the non-sterilized container, and when the non-sterilized seeds are added. Regardless, if you do sterilize, be sure to cool your mix completely before adding your seeds.
I have also read suggestions of adding a weak fertilizer to the mix. The seeds are so small that it certainly seems like they would benefit from some extra nutrients, but these same supplements will encourage algae growth which will smother your plants. Nothing is easy. I have grown many plants from seed without adding any fertilizers but have noticed that some seedlings are very weak and eventually wither away. I am going to try replanting those that failed to thrive with some added fertilizer to see what difference that makes.
Lighting
Obviously, lighting is important since you are growing a plant. I’m not going to get into this because we aren’t starting at zero in our knowledge base. What you might find helpful is that you don’t really need special lighting. Some simple shop lights from any hardware, warehouse club, or department store will do. You don’t need a special full-spectrum metal halide grow lights from a hydroponics specialty store. If you are only growing a few containers you can even use a desk light. What is important is that you use lighting, that it be bright (old fluorescent bulbs tend to dim), and that you are mindful of heat, as you don’t want to cook your plants.
Do not place your condiment cups on a windowsill as direct sunlight will quickly cook your plants. On the other extreme, don’t leave them to grow with just ambient lighting as it is far too dim and your plants will grow leggy, weakly, and/or slowly – if they grow at all.
Office Supplies
Moving beyond the key supplies, probably the next most important relate to recordkeeping. You will need a notebook, a pencil/pen, and a marker. Because the condiment cups are too small to write much on, I normally just number them and then in the notebook I write down what seed corresponds to each number. This is where the marker comes in. Ink from many markers is easy to read, won’t smudge after it dries, and comes right off with some acetone (most nail polish removers will do the trick).
I also keep track of the date of planting so that I know how much time has passed since I started the process. This helps you know when to scour the container looking for the first signs of life, but also lets you know when to give up and start again. If your seeds are old, you can also see how long you had to wait the last time you tried growing them.
Another good thing to jot down is a general description as to the germination rate. This will serve to guide how much seed to sow next time you try growing plants from the same batch.
You will also need a few loose sheets of white paper.
Miscellany
You will inevitably sow too many seeds and see great germination rates. Or, as luck would have it, the six seeds out of 100 that decided to germinate are all right on top of each other. Either way, it is only a matter of time before you will need to thin out your seedlings. For this, you will need some sort of fine-tipped tool. Anything will do, really, as long as it has a comfortable handle and a very fine tip, so just look around your house and borrow from your other hobbies. Examples include tweezers, awls, seam rippers, and bodkins.
Trying to fill 2oz containers with a trowel would just be plain silly while attempting such a feat with your fingers, too unrefined. I use a spoon.
The last thing that you will benefit from is time. Seeds will only grow as quickly as they grow and going from seed to a respectably-sized plant can easily take many months.
Steps
Sowing seeds
So, enough preparations, let’s get started!
1. Gather up your supplies and find yourself a comfortable, well-lit area free from drafts.
2. Choose which seed you want to plant and jot down the date, name, and anything else you want, along with a unique code in your notebook.
3. Use your marker to write that same code on the bottom of the condiment cup. Don’t write on the top, as the top can become separated from the bottom but it would be hard to separate the seedlings from the bottom. Also, writing on the top or sides will block your view of your delightful plants, which you will surely want to look at all the time.
4. Do not add drainage holes to your container!
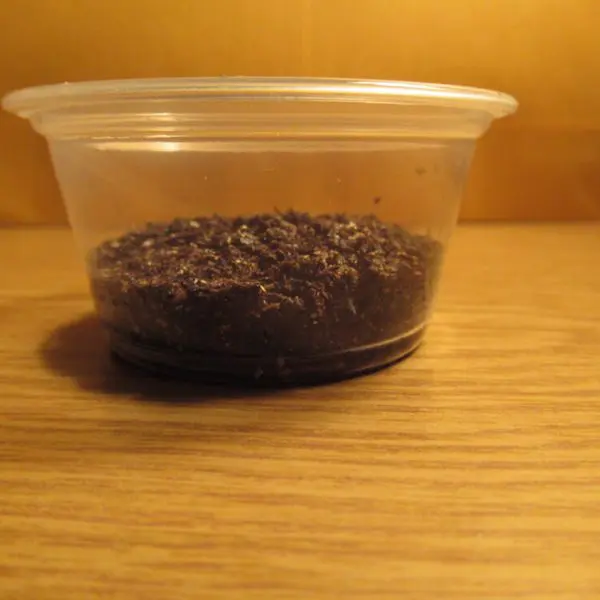
5. Fill the container no more than half way with the moistened and potting mix.
6. Sprinkle the seeds overtop the mix, spreading as evenly as possible.
-
- If the seeds are new, I try for 10-20 at most. If the seeds are older or you know that few will germinate, then add more. Just don’t dump enough to form a layer an eighth of an inch thick. Not only do you not need 300,000 plants, but you won’t have any seeds left over to try again in case something goes wrong.
- Remember that Begonia seeds are tiny so a light breeze, sneeze, or wheeze could send them flying all over the place. This is also why I go one container at a time.
- If seeds are messy and full of chaff, you can dump them over the white piece of paper and then manually clean the seeds. Since healthy, fertile seeds are usually round, you can also roll them around the paper to separate them from the pieces of dried flower. Sort of like panning for gold.
- The paper is also handy if seeds are few and caught up in the folds of the envelope. Just shake, pry, or tear it apart over the paper, then roll the seeds onto your potting mix.
7. Do not bury the seeds!
8. Snap the lid onto the cover the condiment cup.
-
- Seeds do not need bright light to germinate.
- Bright light will encourage algae growth, and algae will quickly smother seeds and young seedlings.
- I don’t actually know what “too hot” or “too cold” would be – it probably varies by species/hybrid. Mine seem to do fine from 60-70° F winter temperatures to 70-80° F summer temperatures.
10. Repeat for all other seeds.
-
- I would advise against trying to do all steps for each seed packet at the same time as you will surely end up mixing up labels, adding seed to the wrong container, etc. and will be at greater risk for contaminants entering all containers.
11. Check your plants daily for signs of life, starting at around half way into the second week.
-
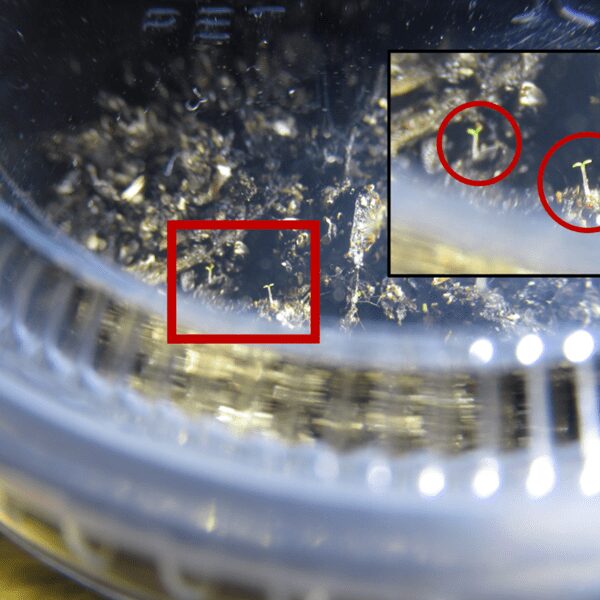
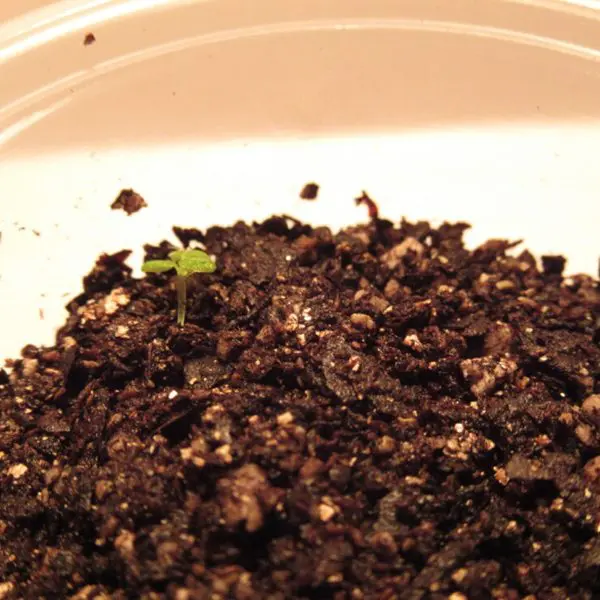
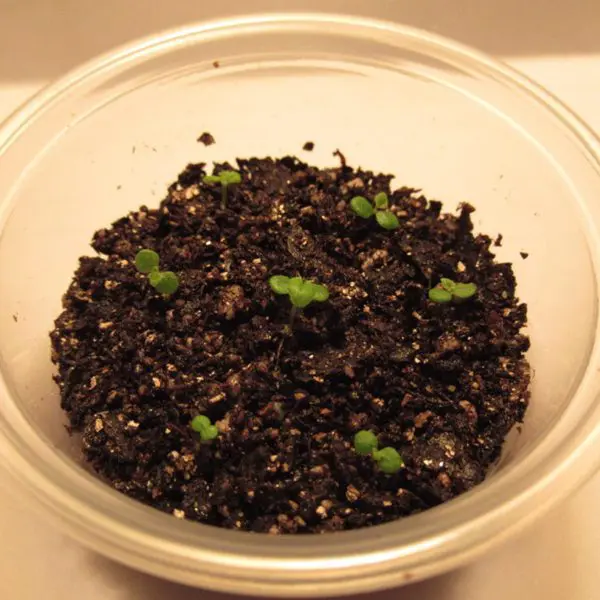
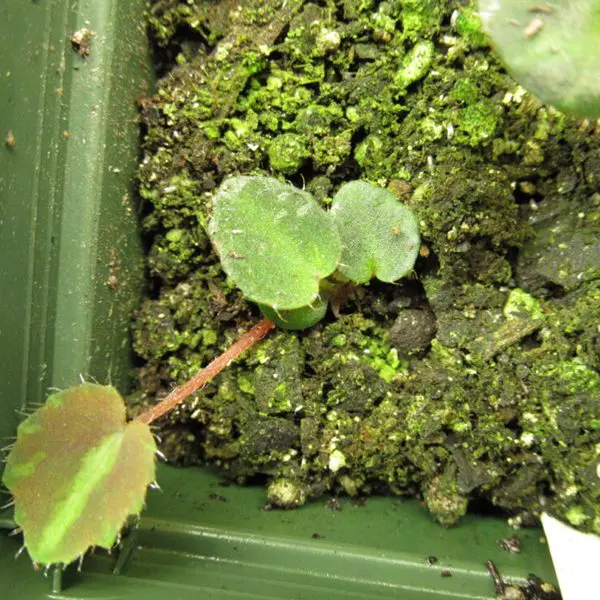
- Newly germinated plants can be really tiny. The first leaves (cotyledons) are always two in number, bright, almost candy apple green in color, round in shape, and sit atop stems that are light green to white in color.
- I find them easier to spot if I shine a small flashlight across the surface at different angles.
- The vast majority of my plants start growing almost exactly after two weeks. It’s uncanny. But do not despair if day 14 comes and goes without movement. I once had seeds germinate three months after sowing, and there are plenty of anecdotes from people whose seeds started growing suddenly after sitting there for far, far longer.
- I also remove any spots of algae, early signs of mosses, fern gametophytes, or patches of fungus.
12. Move an individual container under lights at first sign of growth. The small size of the seeds suggests that the seedlings don’t have much stored energy so they will need quality light to grow. If you forget them or don’t notice growth, the plant might well die before even putting out its first true leaves.
Thinning out
Your plants can’t live in their condiment cups forever, so they will eventually need to be repotted. This will need to be done sooner rather than later if you did not follow my advice about sowing a small number of seeds.
Crowded seedings will shade each other, their roots will tangle, and their growth will be stunted so if too many seeds are germinating in your condiment cup you should take action sooner rather than later. Your two options are to thin them out in the traditional sense, where you pull out or cut away seedlings until they are no longer crowded, while your second option is to transplant them into secondary condiment cups to give them more room. I don’t see the need to explain the first option as it is as straightforward as it is barbaric.
Here are some steps for repotting your crowded seedlings:
-
- Wait until you see them putting out their first true leaves. Unlike the cotyledons, these will have more personality – colors, spots, hairs, irregular shapes or edges. More importantly, they will not be in pairs.
- Clear off your workspace and gather your supplies:
– Condiment cup (the same size as before is fine but you can always go bigger if you want)
– Moistened potting mix
– Fine-tipped tool of choice
– Marker
– Spoon
– Seedlings - Label the bottom of a clean condiment cup with the same code as the seedlings to be repotted.
- Fill the container no more than half way with potting mix and cover loosely with the lid.
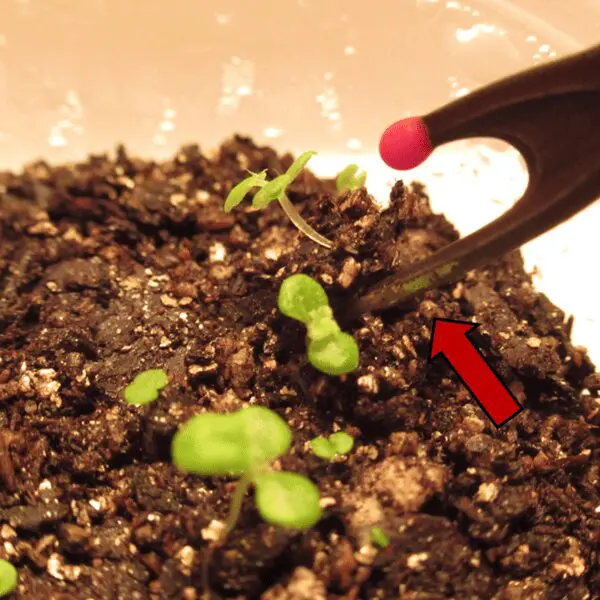
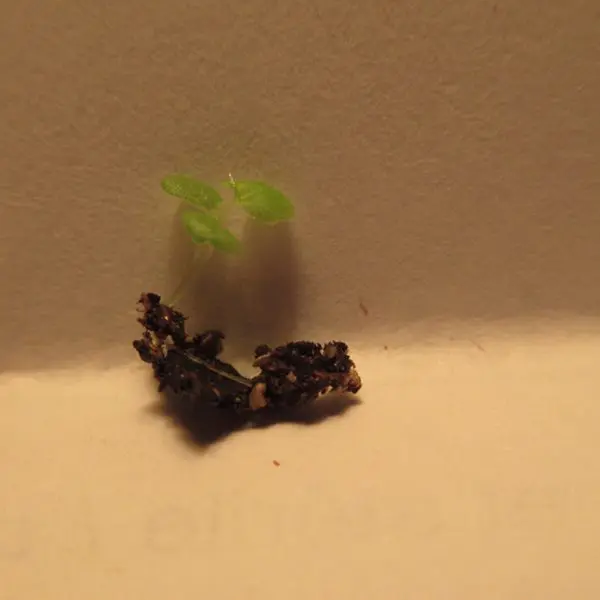
- Gently lift out a single seedling by pushing the tip of your tool under plant and lifting upwards, careful not to damage roots, leaves, or stems. They will recover from minor damage but it will set them back.
6. Replace the lid loosely overtop the crowded container.
-
- You don’t want your seedlings to dry out while you plant the seedling, nor do you want fungus gnats getting in while you are distracted. They know when you are distracted.
7. Transfer the seedling to new container and place it gently on the surface of the damp potting mix, either patting down roots or pushing into an existing crack in soil surface. There is no need to actually bury the plant, and in fact you might damage it if you try.
8. Repeat steps 5-7 as needed. I usually put seven or eight seedlings, evenly spaced, per 2oz condiment cup.
9. Secure the lid of the new container.
10. Repeat steps 3-9 as needed. I usually transplant no more than half of the plants just in case something goes wrong and I need to transplant again. Also, sometimes the crowded plants that I left behind ended up doing better!
11. Place all condiment cups under lights and allow them to grow a few weeks longer.
Interestingly, you can leave the seedlings in the original condiment for quite some time. If crowded, they will often stop growing after putting out only one or two leaves and you can come back later and transplant a few here and there as you wish. I have successfully grown out some begonias that I left in their tiny first homes over a year later and they started growing, no problem. If you try this, though, you’ll have to keep an eye out for algae, ferns, mosses, etc. and will have to water periodically as the containers will eventually dry out (remember that there are no drainage holes so be sure not to overwater!).
Moving up
Seedlings grow at their own rate. Some quickly outgrow their small containers while others seem to struggle to push out even a single leaf. This can even be true even of siblings growing right next to each other. Eventually, though, all that live will need to graduate to a proper pot. Signs that it might be time include large leaves shading each other, stems that are pressing up against the lid, or well-developed root systems that look like they are running out of space. And sometimes the best sign is just that the plant is healthy and growing and it is a convenient time and you have some extra space.
1. Clear off your workspace and gather your supplies:
- Small, clean pots
- Large container with lid for your small, clean pots (e.g., plastic sweater box, aquarium, resealable plastic bag)
- Moistened potting mix
- Fine-tipped tool of choice
- Labels for your plants
- Small tray or dish
- Seedlings
2. Fill a pot up with mix.
3. Knock your seedlings out onto the tray.
4. The roots should be well-developed and in a bit of a tangle, so separate them with the help of your fine-tipped tool. You can be rougher than before, within reason.
5. Make a small depression in the pot and plant the seedling, making sure to cover the roots this time.
- If you waited too long to transplant a shrub or cane, and you find that the stem is very long and bent out of shape, then you can usually bury it a little deeper. Similar to what you would do with tomato plants.
6. Repeat steps 4-5, as needed. I usually transplant four plants per 3.5” pot.
7. Label the pot and place in the large container.
8. Repeat steps 2-7 until the container is full.
9. Place large container under lights and wait a few more weeks.
10. Check regularly to ensure that your plants are growing and to water if they look dry (the plants, not the soil!).
This stage can be interesting as you get to watch your begonias, previously nearly identical, mature out of their juvenile leaves and develop distinct growth habits.
Moving out
Once your plants are of good size (or once you need to free up your large container for a new crop of seedlings) you are ready to start treating your newest begonias as plants instead of seedlings. The most appropriate way to do this is to harden off the plants by cracking open the container and then removing the lid slowly over the course of a few days. You might need to start watering them right away as the potting mix might be completely dry, with the plants relying on the high humidity of their no-longer enclosed environment. Alternatively, you can forego the hardening-off stage and just take your plants out of their containers, although you will have to keep an eye on them and cover them again if they start to wilt and/or burn.
Regardless of your approach, once they seem ready to go you can take them to meet the rest of your collection. You can also congratulate yourself on a job well done!


